Lijit Ad Tag

Showing posts with label Guest Post. Show all posts

Dec 27, 2012

Guest Post: Little Miss Sunshine


Here I was, thinking I wasn't going to be able to come up with a post until the end of the year with all that's been going on, when a little ray of sunshine popped out of the darkest clouds that were looming over my head ... in the form of my niece. Such a great support. Thank you, dear girl, for carting away my cake pans, messing up my kitchen., and "trying" to clear my fridge. That would take many visits, *hint*.  

How can this not cheer anyone up? And if the looks alone doesn't get you, those little sour bursts from the cranberries will! I loved the tartness of the fruit in this and the crunch of the almonds with the caramelization from the sprinkling of sugar. 

Everyone, I'm sharing with you today .... my personal ray of sunshine with her Cranberry Bottom Cake.


My aunt's pantry is a bajillion times better stocked than my own bare-bones, gotta-cart-it-to-a-new-apartment-every-few-months one. Every time I come over I'm itching to bake or cook and take advantage of her ridiculous supply. I've already got several ideas for my next trip so she better be prepared to do some serious eating!


I love the tart explosiveness of cranberries, but I haven't had any of the fruit since my last Thanksgiving in the States 3 years ago (I've been working abroad since). When my aunt mentioned that she had some in the freezer I jumped at the opportunity to bake something with it and promptly found this recipe from the Beantown Baker that I had to adapt a bit (not fully melted butter and coarse sugar), resulting in a thicker batter and thus more of a cake-y-ness than the pie/macaron-ish texture she described. It's fast and easy and the sugar/cranberry/almond bottom resulted in a caramelized coating. The cake itself was just light enough and not too sweet, letting the cranberry's flavor and zest shine through. 


CRANBERRY BOTTOM CAKE

INGREDIENTS

2 cups raw cranberries (fresh or frozen)

zest of half an orange

1/2 cup sliced almonds

1 & 1/2 cups white sugar

2 eggs

3/4 cup (~170g) butter, melted

1 teaspoon almond extract

1 cup all-purpose flour


METHOD


1. Preheat the oven to 325 degrees F (160 C). Grease a 10-inch pie plate or 8-inch square pan.

2. Wash the cranberries, leaving some water on them (thaw first if frozen). Combine the cranberries with the almonds in the pie plate. Sprinkle with 1/2 cup of the sugar. It was basically enough for a layer of almonds and then a layer of cranberries.

3. Cream the remaining 1 cup sugar with the eggs and butter. Stir in the almond extract and zest. Add the flour and mix well. Pour/spread over the cranberries.

4. Bake for 35 to 45 minutes or until a tester inserted near the center of the crust comes out clean. Let cool slightly before serving warm, or serve completely cooled. This would go well with some whipped cream or ice cream.


Happy holidays everyone, enjoy the cranberry cake!


Dec 16, 2012

Guest Post: Homemade Ricotta


Hey everyone!  
Shannon's blog-sitting for me while I'm caught up with one crisis after another. (I can't wait for this year to end ... seriously). 

If you haven't met her by now, hop over to her mostly gluten-free blog, JustAsDelish ... totally healthy and inspiring and get acquainted with one of the sweetest people I've met. 
She's also the reason behind my falling in love with quinoa! And she recently came out runner-up in the Nutriplus baking competition with her fancy mushroom quiche! I can tell you she'd had a better year than I did. Yay for her! 

So, enjoy reading her wonderful post, get inspired and run off to your kitchens and try your hand at making homemade ricotta. 


Here she is ....


Hello, all you Ping's Pickings readers! I'm Shannon from JustAsDelish.com. A gazillion thanks to Ping for asking to me guest post on her fabulous blog. As this is my 1st guest post, I was pretty nervous when she asked. I'm very honoured to do so but I was undecided on which recipe to share because she's such a fabulous cook & baker. Hmm.. what recipe for Ping?
One of the things I enjoy is making food from scratch.. food that is sold in the jars/cans - like condensed milk, peanut butter, yogurt. If a factory can produce them, there should be a recipe for me to try at home. There's nothing more satisfying to me than making them fresh. So what's more apt than sharing a "made from scratch" recipe - Homemade Ricotta Cheese.
Ricotta is a soft Italian curd cheese, light and creamy with a slightly grainy texture and delicate flavour. Making fresh cheese is easier than you think.  If you know how to make Paneer (Indian Cottage Cheese), the recipe is almost similar with milk & an acid (lemon juice or vinegar). Making ricotta needs 2 extra ingredient - plain yogurt and cream. Adding cream did indeed give an even richer edge. It's also possible to make ricotta with just milk, it will be less indulgent & 'healthier'. 
When I suggest to my friend Tracy to make her own Ricotta cheese for her ravioli, she look at me dumbfounded. Making Spinach & Ricotta Ravioli calls for a large amount of ricotta, and a very good 200g ricotta costs RM30 (USD10). She don't believe me how easy (and cheap) it is until I demonstrated to her. In 10 minutes with very little effort, we have a lovely mound of freshly made, still warm ricotta for the price of 1 liter of milk. We tested 2 batches of ravioli with store-bought & freshly made ricotta, and the ones with homemade ricotta win hands-down!
Homemade ricotta makes a wonderful base for Italian cheesecakes, ravioli fillings, and lasagna. Serving slightly warm ricotta over berries or peaches with a drizzle of honey makes a lovely dessert.
For the upcoming Christmas dinner parties & year end celebration, try serving freshly made ricotta accompanied with some stewed fruit compote or poached fruits. Trust me, your guests will be very impressed.

Homemade Ricotta Cheese
Makes: about 200g Ricotta Cheese

Ingredients:

1 liter whole (full cream) Milk
1/2 cup (125ml) plain Yogurt
1/2 cup (125ml) Cream - Optional
1 teaspoon vinegar (or lemon juice)
1/2 teaspoon salt

Instruction:

1. In a large pot, bring the milk, yogurt, cream (if using), and salt to a soft boil. 
2. Add in vinegar (or lemon juice) and boil for 1-2 two minutes, or until the milk curdled.
3. Meanwhile, line a strainer with a few layers of cheesecloth and set it over a deep bowl/pot.
4. Pour the milk mixture into the strainer and let drain for 15 minutes. Gather the cheesecloth around the curds and squeeze gently to extract any excess liquid. And you have warm fresh ricotta 

Note: 
* Homemade ricotta is best served slightly warm, or keep it refrigerated for up to three days, if desired.

* The liquid that is drained out is whey. You can throw it out, or I save it to use in place of milk for my cooking & baking.


Oct 18, 2012

Guest Post : Three Cookies


That's the name of my guest, Three Cookies, not a recipe for 3 measly cookies.
This guest post came at the most appropriate time, never mind that it took Mr T (yes, that's right, that's Mister T to you) 20 months to come up with it. The fact that he actually remembered and made the effort .... I'm happy.

Some of you already know what a crappy few months it's been for me and on top of everything crappy, the car crash I was involved in last Saturday, depriving me of my favorite form of exercise, tennis. And when I'm faced with boredom and lack of exercise, I cook or bake. But, whiplash and a sprained shoulder doesn't make that much fun either. So, yeah, thank you Mr T, your timing is spot-on!

I'M PISSED!!!! So angry with the blinking idiot who drove into my face with no braking space and caused me to t-bone him ... and in the middle of a thunderstorm even! I'm grateful to be writing this here, griping and ranting about it (no episodes of my life flashing before my eyes) but the inconvenience of having no car to go anywhere or do anything. And our public transport is crap! Blinking Imbecilic Idiot!! (Sorry, I'm pissed, remember?) How I wish I had been driving a hummer. That would have been a, "Whoops, what's that? Oh, it's just a bump in the road, drive on."

Right, sorry, Mr T, thank you for allowing me rant.
I'm gonna calm down now and enjoy this. 
Now, as I was saying (before I went on a t-bone tangent) ...

Mr T (first name: "Three", Last name: "Cookies") has 2 very interesting blogs. (How one keeps track and have enough posts for 2 blogs, I know not. I'm already struggling with one). He's been AWOL for awhile now. What he's been up to is for him to know and us to find out. But he's back now and raring to get going again. 
"Three Cookies" is one very unusual blog with 3-part posts of updates on what's cooking/baking, what's the favorite pic of the day and what's the latest in the food world, good/bad.
"Easily Good Eats" is all about his tried and tested recipes ... all easy and good.
Go on over and you'll know what I'm talking about.


And here's Mr T himself.


“Whoo! My first time doing a guest post!” (quote from Pings Pickings) 

Opportunity knocks at every mans (and womans?) door. So when this guest post opportunity came knocking on my door I knew I had to grab it with both hands. Doing a guest post is an honor and great fun, though there is a constant worry. High standards need to be maintained, that’s not easy, and doing a post for Ping means the recipe, writing style and photography has to be top notch. I probably fell short in all areas but Ping kindly compromised her standards and accepted my efforts. Thank you! 

This recipe took me 20 months to make, but its not a slow cook recipe. Sometimes when you see an interesting recipe it gets stuck in your head and if you don’t make it soon it gets on your ‘to make’ recipes list. Over time the list gets bigger, recipes get ignored, forgotten or made after a long time. I first saw the recipe on Eats Well with Others site about 20 months ago and I knew I had to make it.  I never realized it would take 20 months though.

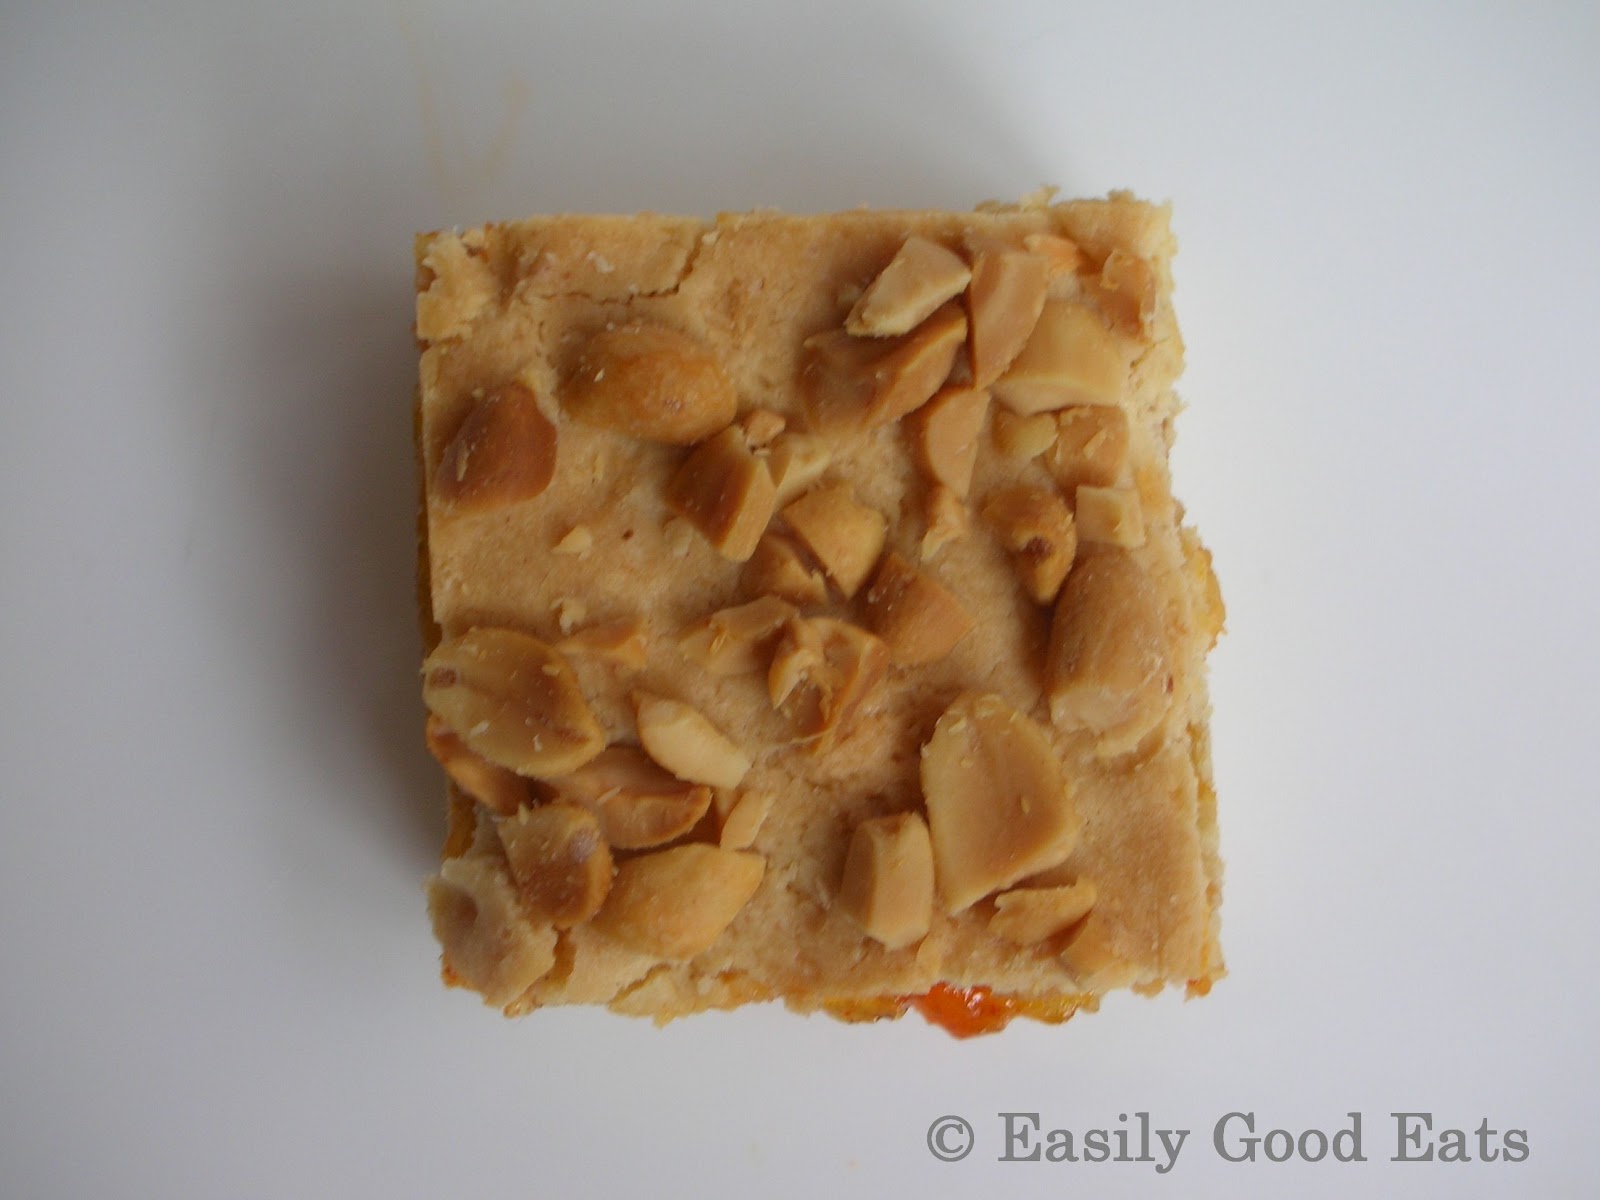
20 months later when I got around to attempting the recipe there was no jam at home. Instead there was mango chutney. According to the laws of ingredient substitution, chutney should work instead of jam. Chutney is effectively jam with spices, and spices and peanuts do go well together. 

The spiciness, saltiness and sweetness, combined with the crunchiness and biscuity (cookiey!) texture was like fireworks in the mouth. 

The bar was excellent but I have one small reservation. I love peanut butter and jam (or jelly!) combination. If I was in the mood of eating peanut butter and jam I would prefer it on toast rather than in bar form. The toast version is unadulterated, you get mainly the peanut butter and jam flavor. In the bar it gets mixed up with flour, sugar, butter and egg, the peanut butter and jam play more of a supporting role. Just a personal preference, don’t let this discourage you. The peanut butter mango chutney bar is still very delicious and if it was offered to me I would grab it without second thoughts.

The recipe is adopted from epicurious. The main changes I made was replacing chutney with jelly and halving the amount. Halving was necessary because mango chutney has a stronger flavor compared with jelly, it can be overpowering.


PEANUT BUTTER CHUTNEY BAR

INGREDIENTS

1½ cups flour
½ teaspoon baking powder 
¼ teaspoon salt
¾ cup smooth peanut butter (I used coconut peanut butter)
¾ cup sugar 
½ cup unsalted butter, room temperature (I used coconut oil)
1 large egg (I used chicken egg)
1 teaspoon vanilla extract
3/8 cup (about 90 ml) mango chutney (original recipe suggests ¾ cup of jelly)
2/3 cup coarsely chopped salted roasted peanuts


DIRECTIONS

1. Heat oven to 350°F/175°C. Line 8 x 8 x 2 inch baking pan with aluminum foil. Coat foil with nonstick spray. 
2. Mix flour, baking powder and salt
3. In a separate bowl beat peanut butter, sugar, and butter with an electric mixer until smooth. Add egg and vanilla, beat on low speed until smooth. 
4. Add flour mixture to the egg mixture and beat on low speed just to blend
5. Transfer half of the dough to the baking pan. Place remaining dough in the freezer for 10 minutes. 
6. Spread the dough evenly on the baking pan. Spread chutney over the dough. 
7. Remove the dough from the freezer. Break into grape-size pieces and scatter over chutney layer. Sprinkle with chopped peanuts. 
8. Bake bars until golden brown and delicious, about 30 – 35 minutes. Cool completely before cutting. 


Thank you again Mr T for this wonderful usage of the mango chutney other than my using it as a condiment or an accompaniment for the scallops


Sep 14, 2012

Balsamic Onions Quinoa Patties & Quinoa Salad

(Guest post at Just As Delish)


Whoo! My first time doing a guest post!
Thank you Shannon, for asking. I'm excited! I'm nervous! I'm panicking!

Shannon asked. I'd said ok. I'd be honored. I asked Shannon if there is anything specific she'd like. She'd said no, no specific recipe. I asked if there are any special requests. And she'd said yes! It needs to be simple and healthy (ie. no deep frying, no loads of sugar/butter/cream). All of the above is what I am ... unhealthy. Now you see why I'm panicking? I'm doomed!
Ok, ok, I'm calm, I'm calm. I just need to see this as a challenge to my high-fat-cream-infused brain. 

Wait. What's this packet of healthy looking thing doing in my pantry? It stuck out like a sore thumb. The mother of all grains, Quinoa! (Well, according to the Incas, anyway).
How healthy is that? 
And when I told Shannon it's going to be quinoa, she said, "Quinoa? Isn't that too healthy for you?". Does she know me or what?

Like what you see? Want to find out more? Head over to Just As Delish and say hi to Shannon.


Thanks again, Shannon, for making me come up with something healthy. It's not as difficult as I thought it would be.


Aug 30, 2012

Guest Post: Brown Butter Peach Scones by Lizzy!


It's Skinny Lizzy!
Lizzy from That Skinny Chick Can Bake ... yet can't get fat. I am so envious of her figure ... grrr... (I used to look like that once upon a time, you know). She claims it's the Hot Yoga she's nuts about but we all know her evil intentions. She's even admitted to it publicly on facebook. See incriminating evidence below:


Lizzy was one of my very early blog friends and pillar of support. She's one who has a great sense of humor and takes my inane comments with a pinch of salt when some others would have unfriended me by now ... facebook or otherwise. (I wonder if it'll actually happen after this). And she has the cutest dog named Lambeau who does great infamous people impressions. Hi Lambeau!!

Today, she's come up with yet another mouth-watering recipe. Brown Butter Peach Scones.


You know I'm so gonna to make this, right? I love scones. And I've always fallen back to my very basic Lemon Scones recipe and tweaked it this way and that. Not this time. This time, I'm following this recipe to the letter ... oh, except maybe the fresh peaches part. I suppose I could substitute that with dried peaches since fresh ones are either difficult to get here or too expensive. Oh what the heck, I'll splurge just for this. (And I'd better do so before the season's over). I can just imagine the subtle perfume of the peaches in each bite and with the sultry scent of cinnamon ..... heaven!

Well, heeerrre's Lizzy, everyone! Enjoy!


Today, I am thrilled to be guest posting for my sweet, hilarious blogger friend, Ping. She is another dear blogger I met through Foodbuzz. Quick witted with a warm, genuine personality, I knew I'd be friends with her after her first comment on my blog. She was patient enough to wait for this post till my summer vacation was over and Nick, my youngest, was moved to college. Now that I'm just baking for a family of three, with my two bottomless pit sons out of the house, I can't whip up round after round of decadent desserts...but a delicious breakfast treat is A-OK.There are still plenty of fantastic peaches available, so I made my version of brown butter scones which I saw on the blog of another friend, Laura (see her blog name listed with the recipe). 

These were moist and full of bites of sensational ripe peaches. The brown butter added another layer of flavor...so definitely worth the extra time and effort.  I brought these to my knitting group (no, I don't knit. In fact, I stink at most crafty stuff...but they are such fun ladies and they tolerate me because I bring snacks ;)). Armed with freshly baked scones, jam and clotted cream, I saw delight in their faces as I set them on the table. At least one friend, a self proclaimed anglophile, had seconds. Guess they were as sensational as I thought.

I did err by using salted butter for the brown butter (laziness more than mistake as it would have required another trip to the market!), so I thought these were a wee bit salty. If you use salted butter, you'll need to decrease the salt to 1/4 teaspoon. But, to tell the truth, no one seemed to notice this but me.


Brown Butter Peach Scones...adapted from America's Test Kitchen with inspiration from Tutti Dolci-All Sweets~

2 cups flour
1 tablespoon baking powder
4 tablespoons sugar, divided
1/2 teaspoon salt
1/4 teaspoon cinnamon
5 tablespoons brown butter (see instructions below)*
1 cup diced peaches, excess moisture dried with paper towels
1 cup heavy cream plus more for glazing
1/2 teaspoon vanilla
Turbinado sugar, for finishing

*A few hours or the day before baking, cook butter (unsalted preferred) in a saucepan over medium heat till brown with a nutty frangrance...this should take 5-6 minutes. Cool, then refrigerate till solid.

Preheat oven to 425º.

Combine flour, baking powder, 3 tablespoons of sugar and salt in mixing bowl.  Whisk to combine.  Cut butter into 1/2 inch pieces, then scatter over flour mixture. Cut in butter with pastry blender until it looks like coarse corn meal with a few slightly larger lumps. Mix peaches with the remaining 1 tablespoon of sugar and the cinnamon. Gently stir peaches into dry ingredients.  Add vanilla to heavy cream, add to bowl, and stir in with spatula or fork till dough begins to form.

Pour out onto flour dusted counter top and knead by hand till comes together into a slightly sticky mass...only about 5-10 seconds.  Pat into a round about 1 inch tall.  Cut into 8 wedges or use cookie cutter to cut rounds

Place onto ungreased or Silpat/parchment lined baking sheet.  May brush with cream and sprinkle with turbinado sugar if desired.  Bake 10-15 minutes (depending on size of your scones) till light brown.  Cool on rack 10 minutes before serving.  May serve warm or at room temperature.  These freeze well.

You may also make these in the food processor.  Be careful not to over process.

Makes 8. 

These are best on the day made.  Freeze leftovers and just pop in the microwave for a delicious treat or freeze unbaked scones and bake a little longer than directed.  


Thanks, Ping, for inviting me into your lovely home. Ping's Pickings is one of my favorite places to stop and visit each week!!! 


Jun 8, 2012

Guest Gripe by Other Half


People, here's a twist to my usual posts.
An opinionated one from the other half.
The half who once claimed he's a simple man with simple tastes. (He'd got himself a simple girl/woman/old lady.) I was relieved when I'd met him since I couldn't cook to save my life. Mother inlaw never bugged me about that flaw and she's a great cook herself ... feeding and spoiling me rotten.
To cut a long story short, now that I've learnt to cook and bake, he's the one getting spoilt. Of course, there were the initial periods when he was the guinea oink and was so sweet, pretending not to gag at whatever he ate. Today, he's a changed man. He will critique "mostly" outside foods knowing full well that if he complains too much about yours truly's stuff, he would end up with the apron around his thickening waistline.
Well, here he is folks, the man of usually very few words speaking his mind ......


Rather than one to go .. Mmmm! Yes, Mon ami, magnifique! .. "truffle infused butter suffused saffron scallop squares!" .. or something similar, I have always been a regular "eat to live" non-foodie. But ever since my cute other half became a food blogger I may have been unconsciously paying more attention to food flavors. Today my latent inner food critic kicked in with a vengeance.

Distracted by shopping with a usually calm cool niece on an unusually fast and furious visit, Ping bought the first food item she came across and brought it home for my late lunch. It was a rather small but hugely expensive .. 'designer' burger. My expectations were high. After all, even I can grill a half decent burger.

The very ordinary packaging foreshadowed a gloomy outcome .. the bun had more than a hint of being past its best. This consideration was backed by a faint and very peculiar sour note to the overgenerous sprinkling of sesame seeds. Their aged softness added next to no textural advantage. All this conspired with the pretentious, scratch-made, excessively vinegary tomato catsup to throw any chance of a chefy flavor balance totally out of whack. Oh .. the ultra lean patty not only had a breadcrumb extender, it had way too much of it. Despite real assurances on the menu, the patty wasn't really grilled. It did not taste smoky .. fake liquid or otherwise. The crisps .. were not. It wasn't really horrid, but it wasn't even average either.

The best part by a long way .. was the perfect little pickle. Crisp, tangy yet sweet, delicious. Until and unless Arlo Guthrie rewrites "The Significance of the Pickle", we aren't going back to that joint. Which pretty much means, never. All I'll say is that it was in Bangsar.

I have religiously avoided critiquing food as I totally understand that one man's foie gras can be another's puke inducer. This should be the last of my food critiques, unless some other commercial offering is again as totally undeserving of its premium price .. as this gilded gherkin.

(Ping's 2 cents: He's right, you know. Can't blame him for griping. I would too. The packaging was such a let down ... a plastic take away box ... burger, salad and soggy fries all crammed in. You'd think the cost of the burger would have covered at least a half-decent 2 package deal to prevent soggy buns. Yeekh. Even the cheap fast food joints with flattened, cardboardy tasting patties have better packaging.)

PS: Check out Arlo Guthrie's "Significance of the Pickle" also known as "The Motorcycle Song". It's a very entertaining song!

http://www.youtube.com/watch?v=PmCwvvwpPAo


May 21, 2012

Guest Post: Elisabeth's Chocolate-Peanut Butter Pudding


Oh YUM!
Two of my very favorite ingredients! Hmm ... come to think of it, I have not many that I dislike. Maybe it might be easier to just say that FOOD is my favorite ingredient! ... as long as there's no durian in it. Yup, must always put that clause in, in case someone accidently slips in some. :D
I'll definitely be making this soon. It sounds simple enough for me not to mess up and sooooo delicious!

Here's introducing Elisabeth of Food and Thrift Finds ... wait a minute, what am I saying?! There really isn't a need to introduce Elisabeth. She's well known in the food blog world. She's the one who's always the first to give her support to a newbie blogger and have continued to be a great friend. Yeah, that's the one ... you know her. She's blog-sitting for me while I run off again for a short while. Thank you, dear friend.
A pro in her field with a big heart. Need I say more?
Here she is with such sweet words .........*blush*


I am so thrilled and honored to guest post for my dear friend Ping, whom I had the pleasure of meeting since we both started our food blogs, nearly two years ago... and have been supporting each other throughout the entire time. Ping has a meticulous food blog, and is very specific about her photos...no more than one, or two, and always a specific size...unlike my photos, which vary in sizes, and step-by-step directions when time permits. Ping has an amazing sense of humor, and always has the right thing to say, on any subject given...only in a "lighthearted" way! Her photos are always perfect, and immaculate, her choice of dishes, desserts, and baked goods are "drop dead" gorgeous, and makes you want to see, and get more! She is kind, and caring, and you will feel blessed to have her as a friend...a beautiful friend, indeed!

Thank you Ping for asking me to guest post..."the second time around!"

(* In case anyone's wondering about the "second time around" .... Elisabeth so kindly did a post for me earlier but was coincidentally the same recipe as QuayPoCooks Macaroons. You can see it here and here. How lucky am I?)


Chocolate-Peanut Butter Pudding
created by: Elisabeth


INGREDIENTS

3 cups whole milk
yolks of 5 large eggs
1 teaspoon vanilla extract
2/3 cup sugar
3 tablespoons cornstarch
5 oz semisweet chocolate
1/3 cup creamy peanut butter
Sweetened Whipped Cream, for garnish


METHOD

Whisk sugar and cornstarch in a medium saucepan, to blend. Gradually, whisk in milk, then egg yolks.
Bring to a boil, stirring constantly. Reduce heat to low and stirring gently, cook for 2 minutes.
Remove from heat, stir in vanilla.

Pour mixture, into a bowl. Add chocolate by breaking it into chunks; add peanut butter. Let stand for a minute, and stir gently together, to combine until well blended.
Carefully spoon pudding into glass goblets, or parfait glasses, smoothing surface of pudding after each
addition.

Place plastic wrap directly over pudding, to keep skin from forming. Refrigerate for at least 2 hrs. or longer.
Garnish with whipped cream, and enjoy!


Apr 27, 2012

Guest Post: One "O" or two "Os"


Hello everyone. I'm back ... at least for a couple of weeks, before I have to run off again to follow up on dad's condition with the doc.
Thanks all for being patient with all this inactivity. Whoo! I can tell you where all the activity was .... back home, at the hospital. But after all the last 10 days' of tests and specialists, we know that it isn't life threatening and not too serious altho looking at the discomfort, depression and distress dad was in really turns my stomach.

Anyway, here I am, with a guest post that is loooong overdue. This was suppose to be set for when I'm gone but things happened earlier than planned and I just wasn't prepared. But thank goodness for this ... I'm so exhausted right now after having just returned home yesterday. So while I recuperate and recharge my old batteries, enjoy!

Veronica, aka, Lucy (as in Lucille Ball), aka Quay Po of Quay Po Cooks, really doesn't need any introduction. She's got tons of fans from all over. And if you need an explanation as to why she calls herself "Lucy", head over to her space and read all about it.
I had the pleasure to meet up with her before all this hoohah happened.
She's such a lovely person to talk to and to be with. It was just the two of us and I don't believe we had even a moment's awkward silence (quite common with first meets) in the hours we had together.
Here's hoping we meet up more times once things settle down on my side.

Here she is, folks! Applause, please .....


One “O” or two “Os”

When Ping asked me to do a guest post for her, I felt honored. I immediately jumped on the offer. It is a great feeling to know that you are regarded as a friend and are trusted to write a post for her. Thanks Ping for thinking of me.

Ping’s blog is one that I love to visit because I always admire her incredible creation of new recipes and also the gorgeous food pictures she puts up on her blog. I also enjoy her humor and the wittiness in her writing.

The last time I met up with Ping, I brought with me some French Macarons, with lemon curd, durian filling, and was so anxious for her to taste the macs. You might guess what happened next. When I told her about the macarons, she said she does not eat durian. Aiyoh, I felt so silly for not inquiring first. I love, love love durian and am clearly guilty of assuming all Malaysians will like it too. I forgot that Ping, while a true blue Malaysian, has worldly taste. I should have made the Macarons with kumquat chocolate ganache fillings for her. Now the kumquat season is over, so I guess I can only make that one for her next year.
So the next time we meet up again, my dear Ping, I will make some of these American coconut macaroons (note, two Os) for you instead.

When I first became infatuated with macarons (note, one O) I mentioned to my Quay Lo (my husband) that I was going to learn to make them but I pronounced it as Macaroons. He was very pleased and when I first produced some from the oven that had not crack into halves, or collapse in a messy blotch in the pan, I proudly took a few to him to try. He took one look at them and said “Darling, what is this? These are not Macaroons. I don’t know what these are.” In fact, my husband’s response was no surprise. The recipe for today is indeed an American concoction which they borrowed from Scottish recipes. The principal ingredients consist of egg whites, sugar and shredded coconut. It is the only confection that my Quay Lo knew to be called Macaroon. It is sometimes called a “Coconut Macaroon” just to be sure the listener knows that it is not the classic French Macaron. Sensing my Quay Lo’s disappointment (which was brief as he was soon devouring the Macarons I had offered) I decided to give the Coconut Macaroon (ala American) a try. Here is the recipe along with the photos and I have to say, I like both confections very much. Still, as I told my Quay Lo, I felt that the Macarons (ala French) is a more refined pastry. “Darling, It has been around since 1791 according to the bible of French culinary wonders, the Larousse Gastronomique” I said to him breezily. “Not when you make it so that it smells like sewer water, my dear” he said dryly back.
So you see my dear Ping, you and my Quay Lo are of the same view and I am out voted. So this recipe is for you and your readers with some assurance that these smell perfectly divine… I promise.


INGREDIENTS

2 large egg whites
3 tbs flour
a pinch salt
1/3 cup sugar
1 (7-ounce) package sweetened shredded coconut
½ tsp vanilla extract


METHOD

Preheat oven to 350 degrees F. In a mixer whip egg whites and salt until they become foamy. Add sugar in slowly. Continue to whip until the egg whites are stiff peaks. Add vanilla extract. Fold in shredded coconut and flour.

On parchment lined cookie sheets, drop a teaspoon of the mixture leaving 1 to 2 inches around each cookie. Place into the oven and bake for 15 to 20 minutes. The outside should be golden brown but the insides should still be moist.

Optional: Drizzle dark chocolate ganache.