Lijit Ad Tag

Showing posts with label Cakes and Cookies. Show all posts

Nov 17, 2015

Rosemary Ginger Banana Cake


I thought I’d posted my favourite banana cake recipe awhile ago. Can’t seem to find it anywhere. 
But, no biggie. 
Here’s a twist to the basic.

That worked really well …. lightly fragrant with rosemary and ginger. I used crystallised ginger instead of fresh, so as not to have it too pungent and spicy. And a sprig of rosemary on the top and not chopped nor mixed into the batter. It is after all, a banana cake and we don’t want to confuse the main hero of this recipe.

And if you’re a stickler for tradition, just omit the herb and ginger and stick with the same proportions, it’ll still yield a lovely loaf…well, three little loaves if you use the same tins I did. 

Enjoy!

INGREDIENTS

1+ 3/4 cups flour, sifted
1+1/2 tsp baking soda
3/4 tsp fine salt

3 large eggs
1+1/2 cups soft brown sugar
1 cup mashed bananas (I used pisang emas, also known as monkey bananas)
1/4 cup melted butter
1/2 cup vegetable oil (or any unflavored cooking oil)
1 tsp pure vanilla extract

coarsely chopped crystallized ginger
rosemary sprigs


METHOD

Preheat oven to 180C.
Oil and line loaf pans. I used 3 mini loaf pans (6”x3”x2”)

Whisk sifted flour, baking soda and salt together.
In another larger bowl, whisk eggs, sugar, mashed bananas, vanilla extract, melted butter and oil until well mixed.
Add flour and fold evenly into mixture.
Stir in chopped crystallized ginger.
Fill tins.
Place a sprig of rosemary on the top of each loaf.
Bake in preheated oven for 45 mins.
Remove from tins and leave to cool on rack.


*(Remove rosemary sprig before consuming.) 


Nov 23, 2014

Jaffa Cake Muffins


Orange and chocolate.
One of the best partnership ever created. 
Marsha hates fake orange flavours. So do I. Well, any fake flavour is horrible anyway. 
Marsha made these. Marsha tempted me. Marsha, this is all your fault for ending my no desserts and no sugar diet.
I shall start that stupid diet again after I’ve finished this lot. Maybe I’ll give them away …. but I’ve already eaten two. One more won’t hurt …. maybe I’ll keep 3 and give away the rest. Maybe I’ll keep them all …. just maybe.

My whole place smells so refreshing, so citrusy, so who needs a room freshener anyway.

The recipe is so simple. 
Blitz everything together, stir and bake. 
I’m at a phase where I’m totally not in the mood for creaming butter and sugar. I wanna blitz things together. Stir. And bake. 
You may call me lazy. Go ahead. Lay-zee….
We deserve to be that every now and then. Pamper yourself. Put your feet up. Enjoy some ME time.  Find an easy recipe, quick and simple, not a ton of utensils and bowls to wash after. Have a muffin (or two, or three, oh come on, you know you wanna) with a nice cuppa. (Not necessarily in that order).

I’ve made an orange pudding quite similar to this in that you blitz the whole orange and everything else and just dump it in the oven. That was awesome too!
This muffin turned out light and moist, unlike the usual denser muffin texture. I guess if you’d just put it in cake molds, you can call it a cake. (Marsha said that too).

Meet Marsha Thompson @ The Harried Cook. 
Nah … she’s not that harried. She likes being harried. She’s happily harried. 


INGREDIENTS

1 whole orange (unpeeled, quartered and seeded)
1/2 cup fresh orange juice
1/2 cup butter, softened 
1 egg
1 3/4 cup plain flour
1/2 cup caster sugar
1 tsp baking powder
3/4 tsp baking soda
pinch of salt
3 oz mini dark chocolate chips


METHOD

Preheat oven to 180ºC. 
Grease a 12 cup muffin tray or use liners or muffin cups. (I just pressed a square of baking paper into each hole...maybe that's why it looks so weird. See partial pic at bottom of page)
In a blender or a food processor, purée the quartered orange and juice until smooth. (Mine wasn’t very smooth but it worked out well. Next time I’ll try it a little chunkier for some citrusy bite).
Add the butter and egg and buzz until combined. Transfer mixture into a mixing bowl.
In a separate bowl, combine flour, sugar, baking powder, baking soda and salt.
Fold this into the purée until completely combined.
Stir in chocolate chips.
Spoon batter into muffin cups.
Bake for about 18-20 mins (I baked a little longer, about 25 - 30 mins).
Remove from the oven. Cool in tin for awhile before removing and serving.
* I discarded the liners once out of the oven (they get soggy while cooling) and left the muffins on a rack to cool.


Nov 2, 2014

Lemon Polenta Cake with Pine Nuts


Found me some gorgeous lemons!
Not aesthetically beautiful …..  but fragrant, lemony, sunshiny, wakey wakey kind of gorgeous!
You must understand my euphoria. The lemons we get here are usually pretty boring …. small, round little things that don’t have that lovely fresh tingly lemony fragrance. Honestly, if I’d never had the chance to taste and smell a better one, I wouldn’t have raved about this lot. 

Naturally the smaller, boring ones are cheaper but eh? what’s the point of getting lemons that don’t smell like lemons? You get that tart taste … we have local limes that are better substitutes. 
And so I bought a bagful… uh … make that 2 bagfuls. 
Forget about making stuff with them, I’m happy just scratching at the skin and sniffing at them. Ooohhh heavenly!

After much scratching and sniffing (great way to disinfect and have super clean and nice smelling nails), I remembered a cake I’d had that made such a great impression on my tastebuds I promised myself I’d make one if I ever got my hands on really good lemons. 
This was it. 
And I’m happy that it’s relatively easy to make. 

This has no flour in it, for the gluten intolerant. But unfortunately, there’s nuts, for folks who are allergic to them. And a ton of butter, for the fat intolerant. Indulge, for the ones who can’t say no to desserts.
Polenta / maize meal / corn meal gives it a grainy, rubble-like texture which works well with the lemon syrup drizzle as it doesn’t go all limp and soggy.

Should you attempt this, go for the good lemons. It’s worth it. Indulge.

(adapted from Nigella’s)
INGREDIENTS

CAKE

200 g butter, softened
200 g caster sugar
200 g ground almonds
100 g fine polenta 
1 1/2 tsp baking powder
3 eggs
zest of 2 lemons (save juice for syrup)
pine nuts

SYRUP

juice of 2 lemons
125 g icing sugar


METHOD

(Nigella uses a 9” springform pan, Base lined, sides greased and baked for 40 mins).
I used mini loaf pans 2” x 4”, bases lined and sides greased. Use a long strip to line the base so that you have a little overhang … to lift out your cake when it’s cooled.

Preheat oven to 180ºC.
Beat butter and sugar til fluffy and pale.
In a separate bowl, mix together the ground almonds, polenta and baking powder, and beat some of this into the whipped butter, followed by 1 egg, then alternate dry ingredients and eggs, beating all the while.
Beat in the lemon zest and spoon into pans. Sprinkle with pine nuts.
Bake for about 20 - 25 mins or until the tops are golden.
Remove from oven but leave in pan to cool.

Meanwhile, make the syrup by boiling together the lemon juice and icing sugar. Once the icing sugar has dissolved, you’re done.

Prick the top of the cake all over with a cake tester and drizzle the warm syrup over. 
(I drizzled about 2 tsps per little loaf. You can always use more but I didn’t want it to be too soggy or drizzle on just before serving).
Leave to cool before removing from pans.
(Use a spatula to loosen the sides a little when removing from pans)

Serve with extra drizzle, lemon curd and/or an extra sprinkling of toasted pine nuts. 
Indulge.


Oct 1, 2014

Chocolate Chips Pumpkin Cake


It’s pumpkin season again. 
I love pumpkins. I used to go crazy thinking of unconventional things to make, cook, bake with pumpkins. 


Crazy moments: 


There must be over a hundred varieties out there. We get a good variety from the local grocers. And to mess about with, I wouldn’t even bother getting expensive imported ones. Our local variety is good enough …. similar to the winter squash, Linus’ pumpkin patch types, the one Cinderella took to the ball and forgot to come back before her curfew and lost her shoe (definitely pretty ill-fitting shoe, I must say, and probably had one too many margaritas … you really have to read between the lines of those fairy tales to get the gist of the saucy substance of what the author is actually trying to say but could not due to childrens’ story books bylaws or whatnots).

Anyway, enjoy this while pumpkin is still in season or just freeze mashed pumpkin and you can have it all year through! 


Oh …. before I go mess about some more ….
For those who do not want to use canned pumpkin puree, you can prepare your own very easily.
Just get rid of the hard skin and seeds. Cut into large chunks and steam them for a few minutes (you can tell when they’re soft. The colour turns a darker orange). 
And, in this recipe, I did not mash the pumpkin too fine (I did call it mash and not puree). It’s good either way. I kinda like the speckled orange look.


(This cake is a combination of recipes. So if anyone feels that this originated from yours, please let me know. I’ll add a link and your cake pic to this). 


INGREDIENTS

1 1/2 cups flour
1/2 teaspoon salt
1 cup brown sugar
1 teaspoon baking soda
1/2 teaspoon cinnamon
1/4 teaspoon freshly ground nutmeg
1 cup mashed pumpkin
1/2 cup (4oz) butter, melted
2 eggs
1/4 cup milk
1/2 cup semi-sweet chocolate chips


METHOD

Preheat oven to 170ºC.
Generously butter a 9”X5”X3” loaf pan or three 6”X3”X2” mini loaf pans.
Combine flour, salt, sugar, baking soda, cinnamon and nutmeg.  Mix well.
In a separate mixing bowl, beat eggs.
Add pumpkin, melted butter, and milk. Mix well.
Combine wet ingredients with the dry and mix.
Fold in chocolate chips.
Pour batter into prepared loaf pan/pans. 
Bake for 40-50 minutes or until a cake tester inserted in the middle comes out clean.
Remove cake from pan and cool on a wire rack.


Sep 24, 2014

Nectarine Ginger Cake


Just trying to save some nectarines ....
Have already put a couple out of their misery. This weather just isn't good for fruits like these. 
They were reasonably priced for a change .... I couldn't resist. 
It's a good excuse to bake and to get myself going again. 

It isn't fun having tennis elbow. It isn't fun not getting to play tennis. It isn't fun not being able to even lift a cup .... gah.
(Can I use that as song lyrics?)

I don't have much to say these days. Forgive me. 
I just eat. 
No, I'm way past my depression days .... not worth it. I'm just grumpy. Lacking in exercise, you know, lacking happy chemicals: endorphins (for the inquiring minds ... "endogenous morphine"), oxytocin, serotonin, dopamine and all.

Messing about in the kitchen, retail therapy ...oh yes... a friend advised me to jog. No elbow use (except flapping it around as you jog ...that hurts too, you know), cheaper than retail therapy and I get my happy chemicals. So I figured I'd get a big, quick fix and jog from store to store. Good, eh?

This is good too. It was experimental. Portion is small. I'm gonna double up for the next one. Add more ginger. Flavors are lovely and subtle. You don't have to take my word for it. Make it and find out.

(So much for having not much to say....)

(Recipe adapted from 手のひらサイズのベイクドケーキ)

INGREDIENTS

72g butter, softened
50g castor sugar
1 egg
1/2 tsp vanilla extract
72g self raising flour
1/8 tsp baking powder
1 tbs yogurt
1 nectarine, pitted and sliced
60g crystalised ginger, chopped or cubed


METHOD

1. Preheat oven to 170°C. Grease a small loaf pan or line with baking paper. (I used a silicon loaf pan. Didn't have to grease nor line)
2. Whip butter and sugar until pale and fluffy. Beat in egg and vanilla. 
3. Stir in yogurt, followed by flour and baking powder. 
4. Transfer batter into loaf pan. Arrange nectarine slices on top and sprinkle chopped crystalised ginger along the sides. 
5. Bake in preheated oven for about 40 mins. 
6. Cool and serve.


Dec 27, 2012

Guest Post: Little Miss Sunshine


Here I was, thinking I wasn't going to be able to come up with a post until the end of the year with all that's been going on, when a little ray of sunshine popped out of the darkest clouds that were looming over my head ... in the form of my niece. Such a great support. Thank you, dear girl, for carting away my cake pans, messing up my kitchen., and "trying" to clear my fridge. That would take many visits, *hint*.  

How can this not cheer anyone up? And if the looks alone doesn't get you, those little sour bursts from the cranberries will! I loved the tartness of the fruit in this and the crunch of the almonds with the caramelization from the sprinkling of sugar. 

Everyone, I'm sharing with you today .... my personal ray of sunshine with her Cranberry Bottom Cake.


My aunt's pantry is a bajillion times better stocked than my own bare-bones, gotta-cart-it-to-a-new-apartment-every-few-months one. Every time I come over I'm itching to bake or cook and take advantage of her ridiculous supply. I've already got several ideas for my next trip so she better be prepared to do some serious eating!


I love the tart explosiveness of cranberries, but I haven't had any of the fruit since my last Thanksgiving in the States 3 years ago (I've been working abroad since). When my aunt mentioned that she had some in the freezer I jumped at the opportunity to bake something with it and promptly found this recipe from the Beantown Baker that I had to adapt a bit (not fully melted butter and coarse sugar), resulting in a thicker batter and thus more of a cake-y-ness than the pie/macaron-ish texture she described. It's fast and easy and the sugar/cranberry/almond bottom resulted in a caramelized coating. The cake itself was just light enough and not too sweet, letting the cranberry's flavor and zest shine through. 


CRANBERRY BOTTOM CAKE

INGREDIENTS

2 cups raw cranberries (fresh or frozen)

zest of half an orange

1/2 cup sliced almonds

1 & 1/2 cups white sugar

2 eggs

3/4 cup (~170g) butter, melted

1 teaspoon almond extract

1 cup all-purpose flour


METHOD


1. Preheat the oven to 325 degrees F (160 C). Grease a 10-inch pie plate or 8-inch square pan.

2. Wash the cranberries, leaving some water on them (thaw first if frozen). Combine the cranberries with the almonds in the pie plate. Sprinkle with 1/2 cup of the sugar. It was basically enough for a layer of almonds and then a layer of cranberries.

3. Cream the remaining 1 cup sugar with the eggs and butter. Stir in the almond extract and zest. Add the flour and mix well. Pour/spread over the cranberries.

4. Bake for 35 to 45 minutes or until a tester inserted near the center of the crust comes out clean. Let cool slightly before serving warm, or serve completely cooled. This would go well with some whipped cream or ice cream.


Happy holidays everyone, enjoy the cranberry cake!


Oct 23, 2012

Chocolate Banana Cake Un-Griped


No more gripes, people!
And another thing before I go on ... if you happen not to like a subject that I'm talking about, just skip right to the recipe. Don't get worked up just because I'm worked up. That's an advice, not a gripe.


I'd seen this recipe and pix at Yee Ling's and Quay Po Cooks and salivated at each. Gotta make it! 

Made it, ate it and loved it! Of course, being true to my can't-leave-a-recipe-well-enough-alone self. I had to change it around (just a little this time, after a major bingka boo-boo phobia) and am happy to show off this cake in all it's moist, bananasome! Awesome! Yummisome! Gimmesome!

Well, that certainly put me in a good mood. 

Chocolate, the all-time feel-good food.

For the original, untweaked recipe, visit Yee Ling.
For the cupcake version, visit Quay Po Cooks.

And if you trust this isn't another boo-boo, read on ...


INGREDIENTS (CAKE)


240 g plain flour
300 g caster sugar
75 g cocoa powder
1.5 tsp baking powder
1.5 tsp baking soda
1/2 tsp salt
120 ml milk
3 medium sized eggs
120 ml flavorless oil (I used grapeseed)
4 medium sized, very ripe bananas, mashed
1 cup warm water
1.5 tsp vanilla extract

sliced bananas to garnish


METHOD

Preheat oven to 180˚C.
Line a 9" X 9" pan with parchment.

Mix together flour, sugar, cocoa powder, baking powder, baking soda and salt in a large mixing bowl.
In another bowl, whisk together the milk, eggs, oil, mashed bananas, water and vanilla extract.
Add the wet ingredients to the dry ingredients and whisk until combined.
Pour mixture into prepared pan and bake 35 - 40 mins.
Cool before slathering with ganache.


INGREDIENTS (DARK CHOCOLATE GANACHE)


220 g bittersweet chocolate, chopped (you can use milk chocolate if you like)
180 ml cream
15 g butter


METHOD

Place chopped chocolate in a heatproof bowl.
Heat cream and butter in a saucepan. Turn off the heat just as it starts to boil.
Pour into chocolate pieces and stir until smooth.
*(If you have difficulty melting the chocolate, place the bowl over a pot of simmering water and continue stirring until you get a smooth, glossy mixture ... water bath)
Cool completely. Mixture will be thick and spreadable. 

(I couldn't wait to eat it and didn't wait for it to cool to a frosting consistency, that's why it looks all gooey and oozy. Just as good!)
Eat by the spoonfuls .... uh, I mean, spread onto cake.


TO SERVE:

Split cake into two. Spread some ganache onto bottom half of cake, layer sliced bananas onto that, top with upper layer of cake, spread with ganache and devour!
Or put more banana slices over the top if you like. 

Go Bananas!


Oct 18, 2012

Guest Post : Three Cookies


That's the name of my guest, Three Cookies, not a recipe for 3 measly cookies.
This guest post came at the most appropriate time, never mind that it took Mr T (yes, that's right, that's Mister T to you) 20 months to come up with it. The fact that he actually remembered and made the effort .... I'm happy.

Some of you already know what a crappy few months it's been for me and on top of everything crappy, the car crash I was involved in last Saturday, depriving me of my favorite form of exercise, tennis. And when I'm faced with boredom and lack of exercise, I cook or bake. But, whiplash and a sprained shoulder doesn't make that much fun either. So, yeah, thank you Mr T, your timing is spot-on!

I'M PISSED!!!! So angry with the blinking idiot who drove into my face with no braking space and caused me to t-bone him ... and in the middle of a thunderstorm even! I'm grateful to be writing this here, griping and ranting about it (no episodes of my life flashing before my eyes) but the inconvenience of having no car to go anywhere or do anything. And our public transport is crap! Blinking Imbecilic Idiot!! (Sorry, I'm pissed, remember?) How I wish I had been driving a hummer. That would have been a, "Whoops, what's that? Oh, it's just a bump in the road, drive on."

Right, sorry, Mr T, thank you for allowing me rant.
I'm gonna calm down now and enjoy this. 
Now, as I was saying (before I went on a t-bone tangent) ...

Mr T (first name: "Three", Last name: "Cookies") has 2 very interesting blogs. (How one keeps track and have enough posts for 2 blogs, I know not. I'm already struggling with one). He's been AWOL for awhile now. What he's been up to is for him to know and us to find out. But he's back now and raring to get going again. 
"Three Cookies" is one very unusual blog with 3-part posts of updates on what's cooking/baking, what's the favorite pic of the day and what's the latest in the food world, good/bad.
"Easily Good Eats" is all about his tried and tested recipes ... all easy and good.
Go on over and you'll know what I'm talking about.


And here's Mr T himself.


“Whoo! My first time doing a guest post!” (quote from Pings Pickings) 

Opportunity knocks at every mans (and womans?) door. So when this guest post opportunity came knocking on my door I knew I had to grab it with both hands. Doing a guest post is an honor and great fun, though there is a constant worry. High standards need to be maintained, that’s not easy, and doing a post for Ping means the recipe, writing style and photography has to be top notch. I probably fell short in all areas but Ping kindly compromised her standards and accepted my efforts. Thank you! 

This recipe took me 20 months to make, but its not a slow cook recipe. Sometimes when you see an interesting recipe it gets stuck in your head and if you don’t make it soon it gets on your ‘to make’ recipes list. Over time the list gets bigger, recipes get ignored, forgotten or made after a long time. I first saw the recipe on Eats Well with Others site about 20 months ago and I knew I had to make it.  I never realized it would take 20 months though.

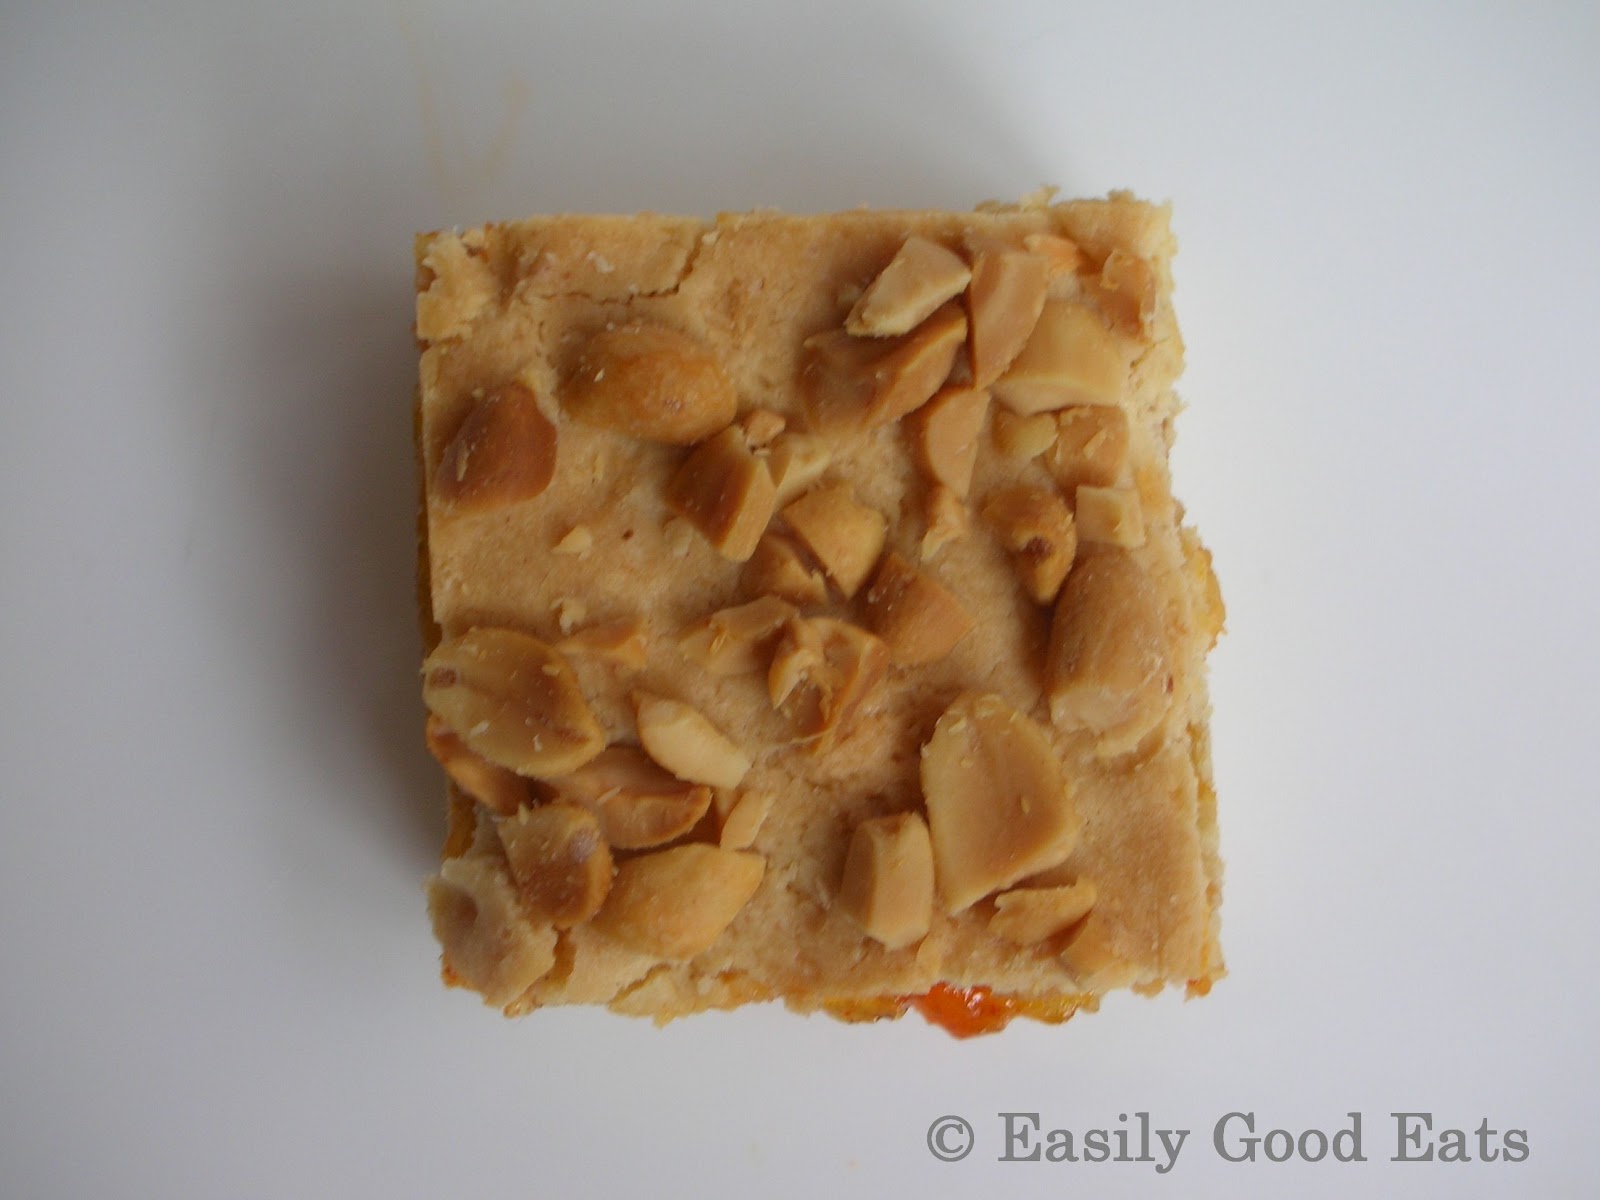
20 months later when I got around to attempting the recipe there was no jam at home. Instead there was mango chutney. According to the laws of ingredient substitution, chutney should work instead of jam. Chutney is effectively jam with spices, and spices and peanuts do go well together. 

The spiciness, saltiness and sweetness, combined with the crunchiness and biscuity (cookiey!) texture was like fireworks in the mouth. 

The bar was excellent but I have one small reservation. I love peanut butter and jam (or jelly!) combination. If I was in the mood of eating peanut butter and jam I would prefer it on toast rather than in bar form. The toast version is unadulterated, you get mainly the peanut butter and jam flavor. In the bar it gets mixed up with flour, sugar, butter and egg, the peanut butter and jam play more of a supporting role. Just a personal preference, don’t let this discourage you. The peanut butter mango chutney bar is still very delicious and if it was offered to me I would grab it without second thoughts.

The recipe is adopted from epicurious. The main changes I made was replacing chutney with jelly and halving the amount. Halving was necessary because mango chutney has a stronger flavor compared with jelly, it can be overpowering.


PEANUT BUTTER CHUTNEY BAR

INGREDIENTS

1½ cups flour
½ teaspoon baking powder 
¼ teaspoon salt
¾ cup smooth peanut butter (I used coconut peanut butter)
¾ cup sugar 
½ cup unsalted butter, room temperature (I used coconut oil)
1 large egg (I used chicken egg)
1 teaspoon vanilla extract
3/8 cup (about 90 ml) mango chutney (original recipe suggests ¾ cup of jelly)
2/3 cup coarsely chopped salted roasted peanuts


DIRECTIONS

1. Heat oven to 350°F/175°C. Line 8 x 8 x 2 inch baking pan with aluminum foil. Coat foil with nonstick spray. 
2. Mix flour, baking powder and salt
3. In a separate bowl beat peanut butter, sugar, and butter with an electric mixer until smooth. Add egg and vanilla, beat on low speed until smooth. 
4. Add flour mixture to the egg mixture and beat on low speed just to blend
5. Transfer half of the dough to the baking pan. Place remaining dough in the freezer for 10 minutes. 
6. Spread the dough evenly on the baking pan. Spread chutney over the dough. 
7. Remove the dough from the freezer. Break into grape-size pieces and scatter over chutney layer. Sprinkle with chopped peanuts. 
8. Bake bars until golden brown and delicious, about 30 – 35 minutes. Cool completely before cutting. 


Thank you again Mr T for this wonderful usage of the mango chutney other than my using it as a condiment or an accompaniment for the scallops


Aug 30, 2012

Guest Post: Brown Butter Peach Scones by Lizzy!


It's Skinny Lizzy!
Lizzy from That Skinny Chick Can Bake ... yet can't get fat. I am so envious of her figure ... grrr... (I used to look like that once upon a time, you know). She claims it's the Hot Yoga she's nuts about but we all know her evil intentions. She's even admitted to it publicly on facebook. See incriminating evidence below:


Lizzy was one of my very early blog friends and pillar of support. She's one who has a great sense of humor and takes my inane comments with a pinch of salt when some others would have unfriended me by now ... facebook or otherwise. (I wonder if it'll actually happen after this). And she has the cutest dog named Lambeau who does great infamous people impressions. Hi Lambeau!!

Today, she's come up with yet another mouth-watering recipe. Brown Butter Peach Scones.


You know I'm so gonna to make this, right? I love scones. And I've always fallen back to my very basic Lemon Scones recipe and tweaked it this way and that. Not this time. This time, I'm following this recipe to the letter ... oh, except maybe the fresh peaches part. I suppose I could substitute that with dried peaches since fresh ones are either difficult to get here or too expensive. Oh what the heck, I'll splurge just for this. (And I'd better do so before the season's over). I can just imagine the subtle perfume of the peaches in each bite and with the sultry scent of cinnamon ..... heaven!

Well, heeerrre's Lizzy, everyone! Enjoy!


Today, I am thrilled to be guest posting for my sweet, hilarious blogger friend, Ping. She is another dear blogger I met through Foodbuzz. Quick witted with a warm, genuine personality, I knew I'd be friends with her after her first comment on my blog. She was patient enough to wait for this post till my summer vacation was over and Nick, my youngest, was moved to college. Now that I'm just baking for a family of three, with my two bottomless pit sons out of the house, I can't whip up round after round of decadent desserts...but a delicious breakfast treat is A-OK.There are still plenty of fantastic peaches available, so I made my version of brown butter scones which I saw on the blog of another friend, Laura (see her blog name listed with the recipe). 

These were moist and full of bites of sensational ripe peaches. The brown butter added another layer of flavor...so definitely worth the extra time and effort.  I brought these to my knitting group (no, I don't knit. In fact, I stink at most crafty stuff...but they are such fun ladies and they tolerate me because I bring snacks ;)). Armed with freshly baked scones, jam and clotted cream, I saw delight in their faces as I set them on the table. At least one friend, a self proclaimed anglophile, had seconds. Guess they were as sensational as I thought.

I did err by using salted butter for the brown butter (laziness more than mistake as it would have required another trip to the market!), so I thought these were a wee bit salty. If you use salted butter, you'll need to decrease the salt to 1/4 teaspoon. But, to tell the truth, no one seemed to notice this but me.


Brown Butter Peach Scones...adapted from America's Test Kitchen with inspiration from Tutti Dolci-All Sweets~

2 cups flour
1 tablespoon baking powder
4 tablespoons sugar, divided
1/2 teaspoon salt
1/4 teaspoon cinnamon
5 tablespoons brown butter (see instructions below)*
1 cup diced peaches, excess moisture dried with paper towels
1 cup heavy cream plus more for glazing
1/2 teaspoon vanilla
Turbinado sugar, for finishing

*A few hours or the day before baking, cook butter (unsalted preferred) in a saucepan over medium heat till brown with a nutty frangrance...this should take 5-6 minutes. Cool, then refrigerate till solid.

Preheat oven to 425º.

Combine flour, baking powder, 3 tablespoons of sugar and salt in mixing bowl.  Whisk to combine.  Cut butter into 1/2 inch pieces, then scatter over flour mixture. Cut in butter with pastry blender until it looks like coarse corn meal with a few slightly larger lumps. Mix peaches with the remaining 1 tablespoon of sugar and the cinnamon. Gently stir peaches into dry ingredients.  Add vanilla to heavy cream, add to bowl, and stir in with spatula or fork till dough begins to form.

Pour out onto flour dusted counter top and knead by hand till comes together into a slightly sticky mass...only about 5-10 seconds.  Pat into a round about 1 inch tall.  Cut into 8 wedges or use cookie cutter to cut rounds

Place onto ungreased or Silpat/parchment lined baking sheet.  May brush with cream and sprinkle with turbinado sugar if desired.  Bake 10-15 minutes (depending on size of your scones) till light brown.  Cool on rack 10 minutes before serving.  May serve warm or at room temperature.  These freeze well.

You may also make these in the food processor.  Be careful not to over process.

Makes 8. 

These are best on the day made.  Freeze leftovers and just pop in the microwave for a delicious treat or freeze unbaked scones and bake a little longer than directed.  


Thanks, Ping, for inviting me into your lovely home. Ping's Pickings is one of my favorite places to stop and visit each week!!!